How do I change DNS settings on Windows 10?
Article Number: 917 | Rating: Unrated | Last Updated: Wed, Jan 30, 2019 3:15 PM
How do I change DNS settings on Windows 10?
Aimed at: Edinburgh Napier’s staff
To change the DNS settings on your Windows 10 device using Control Panel, do the following:
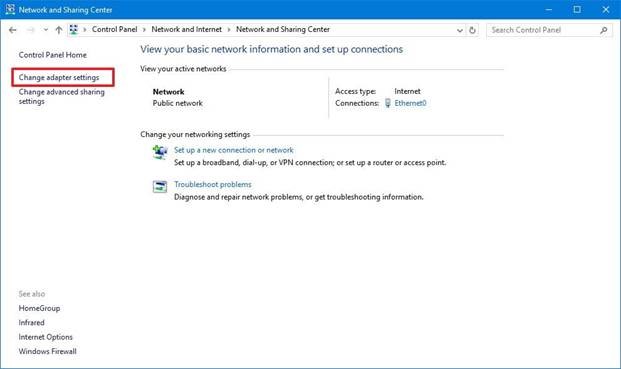
- Open Control Panel.
- Click on Network and Internet.
- Click on Network and Sharing Center.
- On the left pane, click on Change adapter settings.
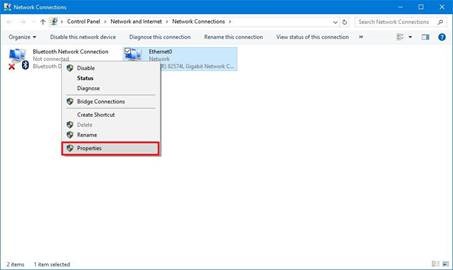
- Right-click the network interface connected to the internet, and select Properties.
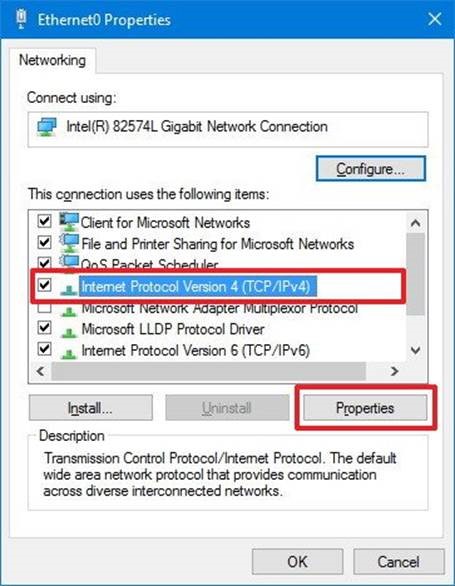
- Select Internet Protocol Version 4 (TCP/IPv4) from the list.
- Click the Properties button.
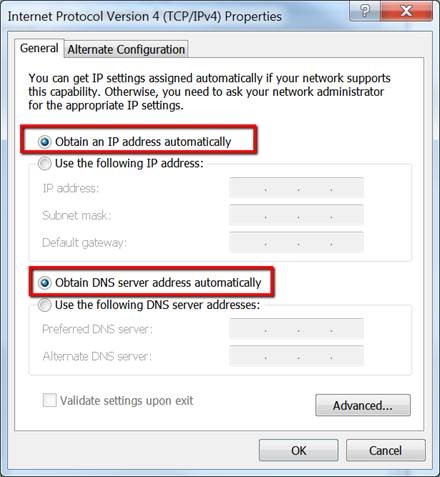
- Click the Use the following DNS server addresses option.
- Type your preferred and alternate DNS server addresses. Here you can enter any DNS servers you want, including from free ones such as Google Public DNS or OpenDNS.
- Google Public DNS addresses: 8.8.8.8 and 8.8.4.4
- OpenDNS addresses: 208.67.222.222 and 208.67.220.220
- Click OK.
- Click Close to apply the new DNS settings to the adapter.
Once you complete these steps, your computer will immediately start using the new DNS settings.
